Easy Steps to Frame and Hang Your Diploma
Your hard-earned diploma is worth showing off in a high-quality frame. There are a variety of diploma frames available at University Frames Inc, and we provide cutting-edge frame designs to match your personal style, which is ideal for showcasing your diploma or degree.
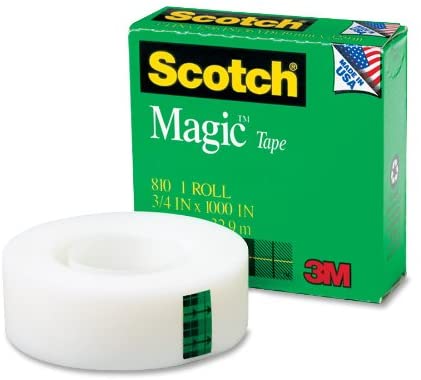
Watch this video to learn how you can frame your diploma and tassel in our custom diploma frame. We will guide you on how to use the equipment that is included in your University Frame package to make your framing process easier. We also explain how to align your diploma with the mat board opening and secure it with the Scotch® Magic Tape archival tape (No longer included in the framing package).
- Step 1: Place your frame upside down on the bubble wrap to protect its finish.
- Step 2: Bend the flexible black tabs to lift the dust cover (We recommend a small screwdriver to lift the tabs rather than your fingers).
- Step 3: Bend all tabs to remove the mounting board. Do not remove the cut-out mat board.
- Step 4: Align your document over the mat board opening, making sure that its sides are parallel to the edges of the opening.
- Step 5: Attach your document to the mat board with the Scotch® Magic Tape.

- Step 6: Lift edge of release paper - rip off the plastic tab from the adhesive strip. Pull release paper to expose about ½ of the adhesive strip. Tear the adhesive at this point and apply it to the upper left side of the document and mat board. Remove the remaining release paper and apply the adhesive to the upper right side of the document and mat board. Rub the adhesive on firmly.
- Step 7: Replace the mounting board and bend the black tabs back in place.
Tassel Instructions
If you have purchased a frame which accommodates your graduation tassel, simply insert its hanging cord through the hole and tape it securely to the back of the mounting board.
How to Hang Your Frame Easily with Blink Hanging System
Once you have framed your diploma, now you need to mount the frame on the wall! In this video, we'll share the wall mounting steps for your diploma frame. You will need the wall mounting kit that comes included in your frame package; it includes one level, two nails, and a bumper to be placed on the back of the frame, at the bottom. You'll also need a hammer. Watch this video carefully to learn how to mount your diploma frame - follow the steps and your diploma frame will hang perfectly on your wall and showcase your accomplishment.
Blink and UF are proud to introduce a new hanging system. It’s fast and easy to install.
- Step 1: Remove the rubber safety stopper.
- Step 2: Place the level on the top of the frame and adjust until it’s leveled.
- Step 3: When the frame is aligned, push the frame over hangers against the drywall, until it’s punctured.
- Step 4: Remove the level and the frame, and begin to hammer in nails where the frame made the 2 new holes.
- Step 5: Align the hangers to the nails and set the frame down until they connect.
It’s That Simple!
If you have any questions about framing or hanging your diploma, please feel free to call our customer service at (800) 711-1977.
How to Insert Diploma and Hang your Lucent Frame
Lucent Frame: Mounting Diploma
- Step 1: Remove frame from packaging and place on top of protective bubble wrap. Slightly hang frame over surface and unscrew the 4 small stainless steel can and set aside.
- Step 2: Carefully lift off the top acrylic piece and set it aside on the kraft paper.
- Step 3: Locate the small piece of adhesive on the back glass and remove the release paper.
- Step 4: Keeping the diploma from touching the adhesive, align the diploma to the 4 index marks located on the back piece of the acrylic.
- Step 5: Once aligned, slowly lower the bottom of the diploma as it contacts the tape, being sure to keep it aligned with the index marks. Gently press your diploma against the tape.
- Step 6: Replace the top acrylic piece, keeping all the holes aligned. Reinsert stainless steel caps. Only tighten once all four have been partially inserted. Stop tightening once the caps come into contact with the acrylic. DO NOT OVER-TIGHTEN
Hanging Your Lucent Frame
- Step 1: Use hanging guide provided in package.
- Step 2: Remove film from "Glue Dots" located on the back of aid. Set the two hanger nails aside.
- Step 3: Position aid on wall - level it with the bubble and then press against the wall to secure it with the "Glue Dots".
- Step 4: Mark the wall in the corners of the 2 notches shown on the example.
- Step 5: Remove aid from wall- hammer pins into wall at a downward angle until disc is flush to wall.
- Step 6: Hang the frame onto the pins.

